
*Please note, the mask design on this page is NOT meant as a N95 substitute. It is the type of mask you would wear to prevent spreading/receiving germs and to help you not touch your face.
The biggest thing to remember is that this is not tailoring work. No one cares what pattern fabric you use, or if your stitches are not straight or pretty. It is more important that the masks be able to withstand heavy washing, and made quickly.

So, after a few people have asked me what I am doing regarding making masks, I decided to post something. We certainly don’t need another tutorial, but here are my thoughts.
I started out with a written tutorial someone tagged me in on Facebook. Now I have been sewing since I was a child, and I think I am pretty good at it. But this tutorial had me so confused I gave up and went to YouTube. I guess I need more visual instructions as I get older. I viewed a few, tried a few, and finally had what I wanted. But after making a couple dozen I realized a few things.
- I was out of elastic
- It had extra steps we don’t need
- I hate making bias tape
Here is an overview of what I am doing to make these masks. See the attached picture:
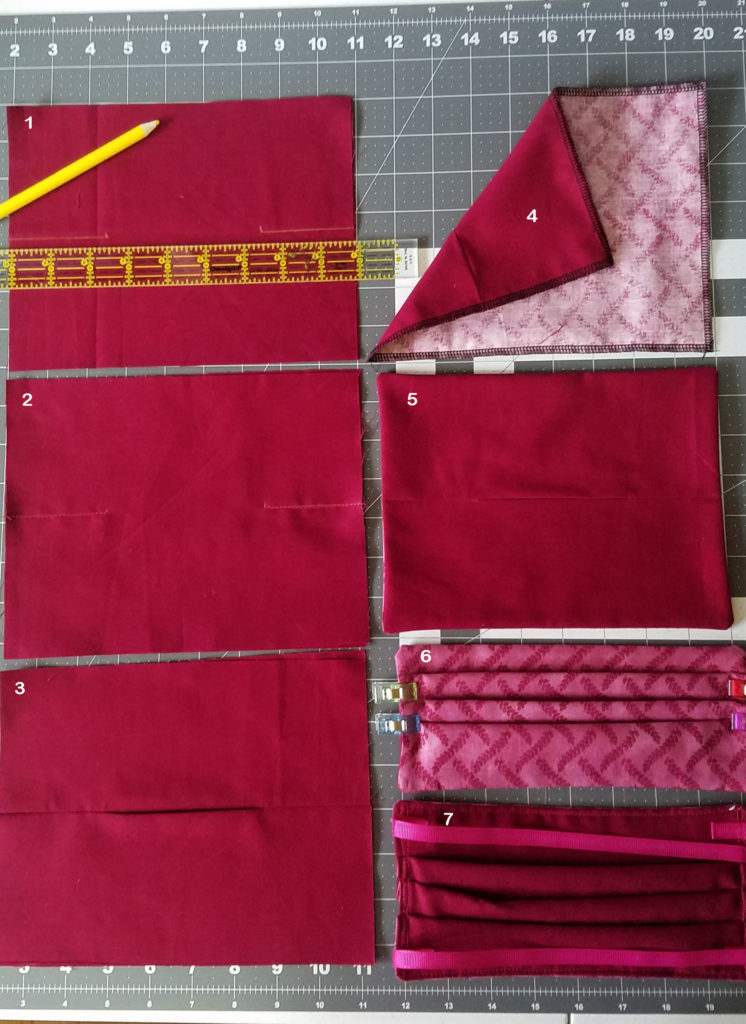 Cut 3 pieces of good cotton fabric 9”x7”, one a print and two plain (this helps differentiate between the front and back of the mask). 4 pieces of 3/8” ribbon, 16”-18” long. Use Grosgrain ribbon or other non-slippery type. Refer to photo for visual:
- Using a fabric marker measure ½ way up the 7” side and mark 2.5” in on either side.
- Stitch from edge to mark, backstitching at marks.
- Fold each piece on the stitch line and press. Now you will have a 3” hole in the middle. This is where you can insert a filter, so this is the back of your mask.
- Place print fabric on top of back right side down. Stitch all 4 sides (I used the Serger, but any machine will work).
- Turn right side out through the filter hole, and press.
- Here is the tricky part. Folding 3 pleats about ½” each, tack down. I will try to describe it better below.
- Fold ribbon ends over about ½”. Sew around all 4 sides ¼ inch in, attaching a ribbon piece at each corner as you go. Sew again about 1/8” in. I also sewed around the ends of the ribbons to make them more secure.
I have ordered more ribbon (there is plenty online right now). For the next one I make I think I am going to attach the ribbons to the front of the mask to give them a better seal to the face.
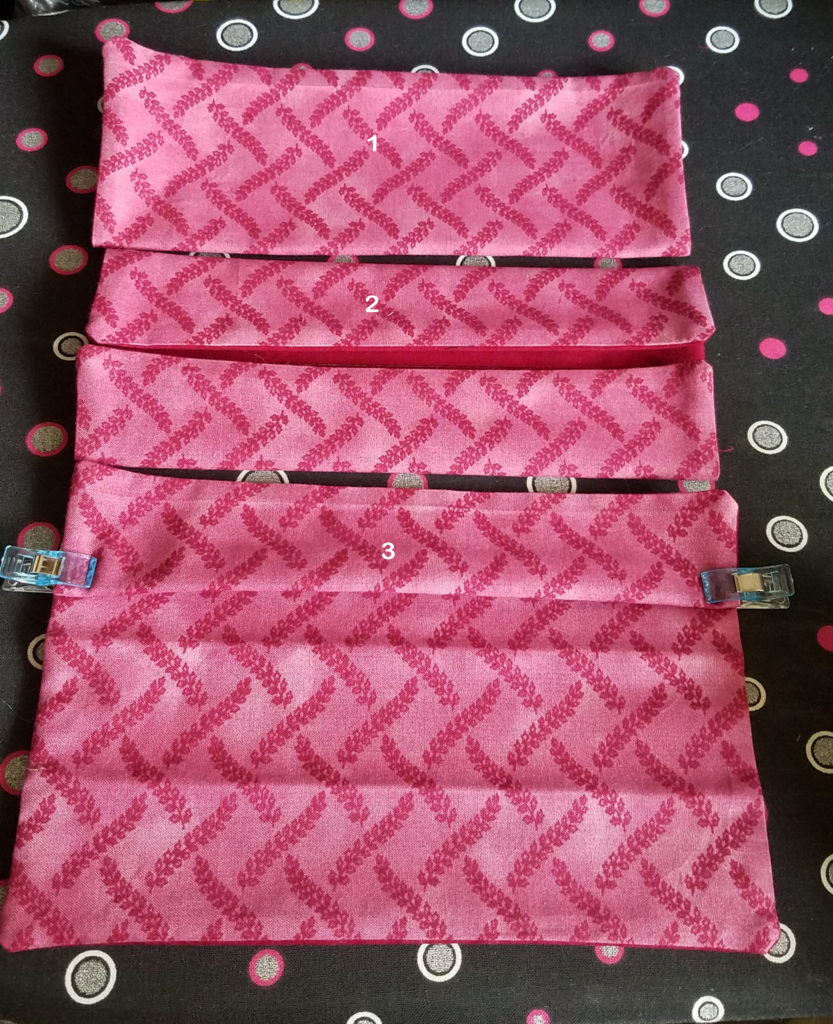
Now, to fold the pleats –
- Fold in half, press.
- Open up and fold each side in to the middle and press.
- Turn over and bring up the fold and lay down about ½” above the next fold, clip or pin down. Repeat with next two folds (refer to #6 in previous photo).
I hope this is helpful to my fellow crafters. It is streamlining the work, and making it go much faster. I do 6 at a time, chaining them as I go. It takes less material, less cutting, and pressing. But I will confess, I have a hard time not being a perfectionist and just pumping them out.